
Open a default Express node.js application from Visual Studio 2013
node.js and Visual Studio
node.js is a very popular platform which allows having Javacript executed on the server. This is what everybody reads when navigating on the official site:
Node.js® is a platform built on Chrome’s JavaScript runtime for easily building fast, scalable network applications. Node.js uses an event-driven, non-blocking I/O model that makes it lightweight and efficient, perfect for data-intensive real-time applications that run across distributed devices.
During the last couple of years Microsoft has put a lot of effort to provide a nice experience when we want to develop a node.js application by using Visual Studio. This comes of course in conjunction of supporting node.js hosting on the company’s cloud platform Microsoft Azure. We are able to develop any node.js application in Visual Studio because of the Node.js Tools for Visual Studio awesome open source project. This is an extension that is completely free and anyone who is interested could install it on Visual Studio. After installing the extension we can create various node.js applications as we can see in the following picture.
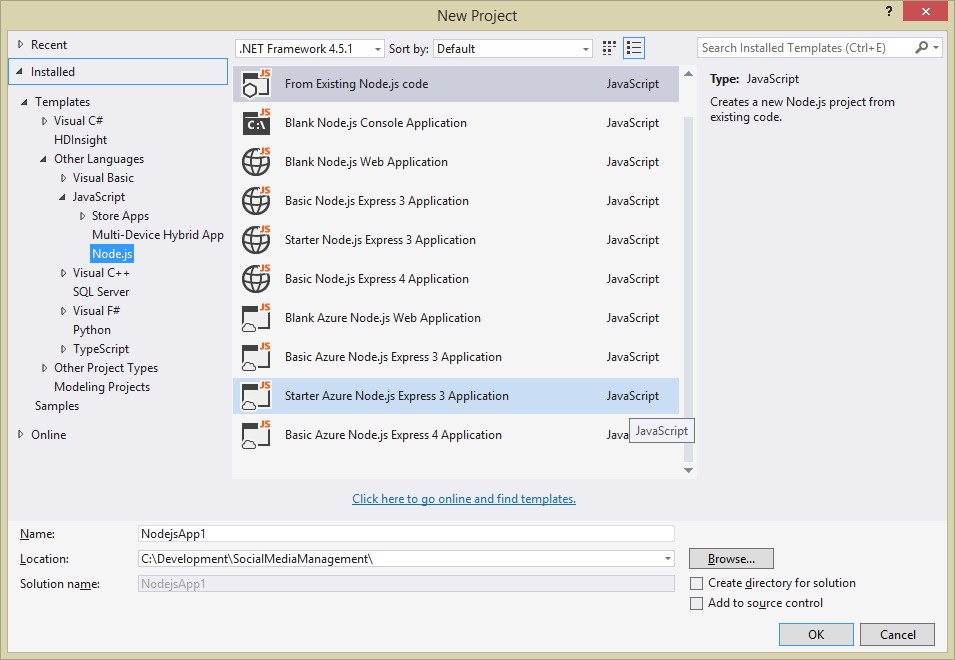
Open an existing node application
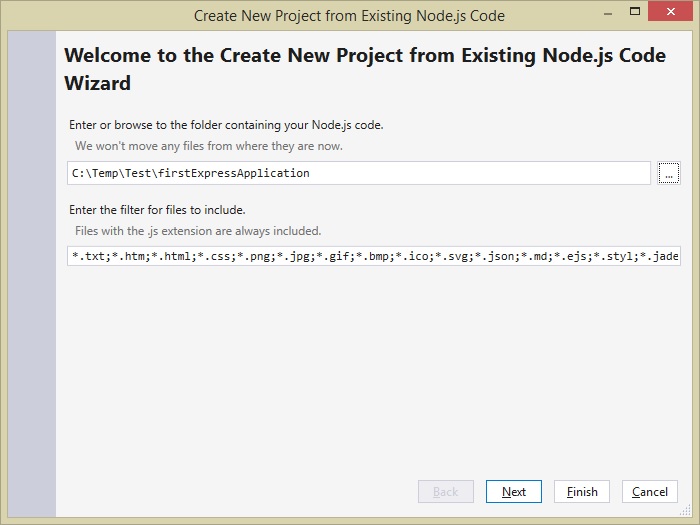
The most interesting part according to my opinion is the first one, From existing Node.js code, as it gives us the opportunity to open an existing node application that was created from a different IDE and maybe on a different platform (Linux, OSX). This option gives us tremendous freedom to start contributing in a node.js project that some members of the team use different IDE and are on different platforms and we can still use Visual Studio without problem. Let me demonstrate how this works and also mention a fix to a minor problem.
Create a default Express application
The first step is to create the default Express application. I am not going to explain the prerequisites of doing this as here you can find very detailed instructions. After we have installed all the required dependencies and we have created a folder somewhere in our system, we should open a command window to the newly created folder and just hit:
- cmd
express firstExpressApplicationand after this is finished we have to move to the newly created folder and install the referenced node packages. This can be done my hitting:
- cmd
cd firstExpressApplication
npm install
At this point we have a very simple Express application which we can launch by typing in the command window
- cmd
set DEBUG=firstExpressApplication & node .\bin\wwwAfter doing this just open a browser tab and navigate to the url: http://localhost:3000 and you should see the default express application running.
Open the Express application from Visual Studio
Now is the most interesting part where we can open this application from visual studio further change it. After giving a name in the window that is shown in the picture above we press next and we are presented with a window like the one following where we should choose the folder that contains the application’s code.
After clicking next a window like the following is shown to us where we can choose which file should be executed when F5 is pressed.
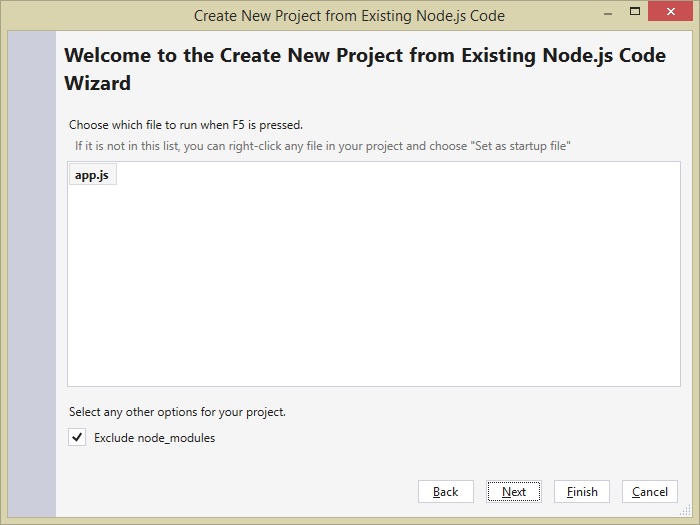
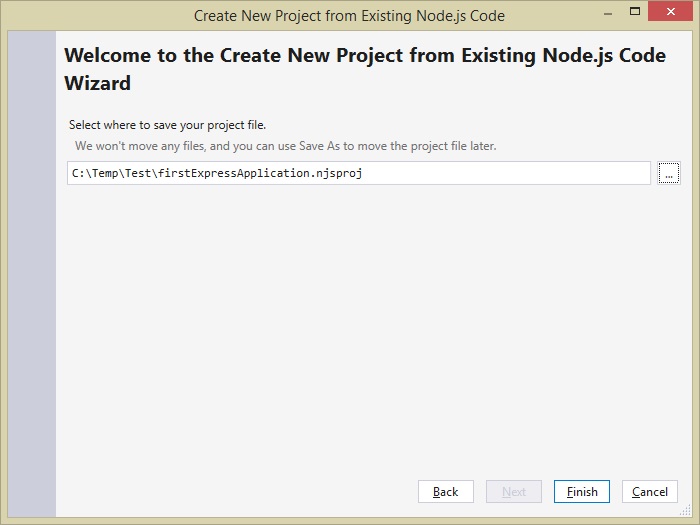
Here is the small problem as it doesn’t give us the option to choose the bin\www file which contains the initialization logic. We have to manually change this after the Visual Studio project creation is finished. We are leaving the app.js file as selected and click next. The coming window is a great thought as it gives the flexibility of storing the Visual Studio project file in a different place than the original Express application. This means that we could even not add this file to source control and definitely it is not going to bother other people in the team that they don’t use Visual Studio.
Fixing the problem of initial file
When the importing of the project is finished we can press F5 in order to achieve the same result as previously where we start the project from command line. But if we do this we will experience an error. A normal debugging session is starting and a command window with debugger details is shown but after a couple of seconds the window is disappeared and no application is present. This is due the starting file selection we made earlier. In order to fix this issue we need to edit the project and change the corresponding setting manually. We have to spot the StartupFile setting that is set in app.js and change it to bin\www. After saving the changes, reload the project and pressing F5 everything should work as expected.
You can find more details for node.js tools for visual studio in the codeplex project
